build it
building the module should be straightforward; just follow the silkscreen ...

NB:
- the unmarked passives are
100n - the resistors labelled "LED" are ... for the LEDs. as per the BOM, use ultrabright LEDs and correspondingly large resistor values (typically, that'll be something >
10k, depending on preference) - voltages to check (once populated): does the LM1117 output
5V? does the ADP150 output3.3V? does the LM4040 output-10V?


-
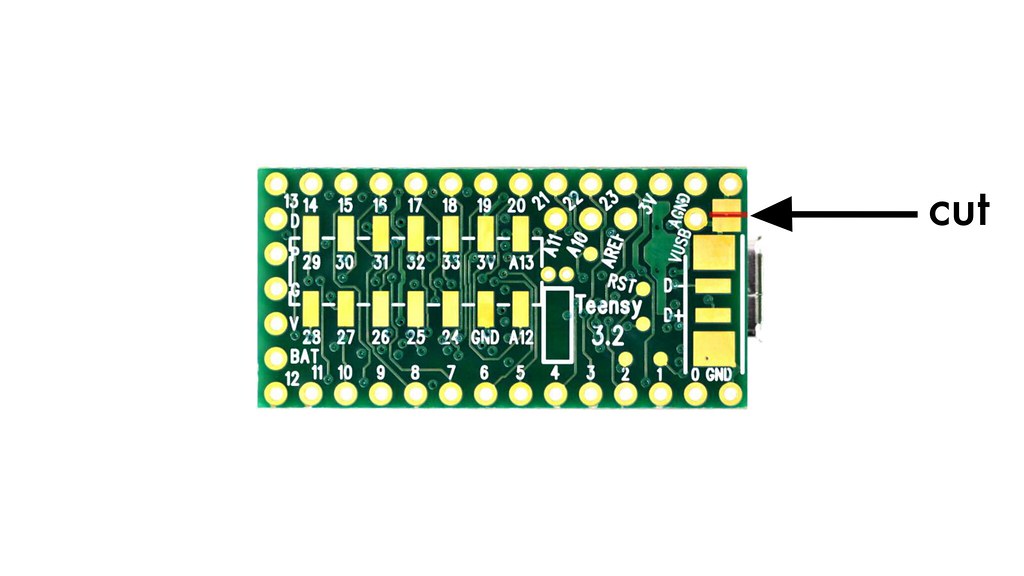
you have to cut one trace, to separate V_USB and the external/eurorack PSU. this is the trace:

- there's just one (ummarked) passive on there, that's the resistor for the "learn" LED. (again, the value will somewhat depend on your preferences / choice of LED).
- LED anode (long leg) < > square pads.
- ignore the electrolytic cap on the very top of the board (near the top-most potentiometer); or if you have, you can put in a subminiature 1uF or the like (> 25V).
- also: don't forget you need two stereo (!) jacks for the midi input and output; and (as always) it'll make sense to fit the panel first before soldering the jacks/pots.
-
There are two ways of getting the firmware onto your module:
- Method A: upload a/the pre-compiled HEX file. this is easy and quick. or
- Method B: install the Arduino IDE and the Teensyduino add-on, and compile the code yourself.
-
either way, you’ll need: a micro-usb cable (make sure this isn’t for charging only, but data transfer).
-
NB: the following steps assume that you have cut the usb trace (which is a safe thing to do), see above.
step 1): download the teensy loader app.
step 2): download the hex file: releases.
- make sure a USB cable is connected to the Teensy, and that the module is powered up
- press the program push switch on the Teensy board (on the back of the module)
- (you should briefly see a progress bar as the firmware is uploaded)
- if not, click the program icon, or choose
programfrom the operation menu in loader app. - that should be it.
- if you don’t have it already, you need to install the arduino IDE as well as the teensyduino add-on.
- clone from https://github.com/mxmxmx/CV2Midi or download the .zip file. use the master branch (which is the default); the develop and other branches contain code which may or may not contain bugs.
-
open the file called C2M_X.ino. now make sure you:
- select teensy 3.2/3.1 in
Tools > Board. and - select 120MHz optimized (overclock) in
Tools > CPU Speed. and - select Faster (= o2) in
Tools > Optimize, then - hit compile ... and download to your board
- select teensy 3.2/3.1 in
- if this is a newly built module, proceed to calibration.