This is a ready-to-use html code template that allows you to create an interactive image viewer. This viewer requires at least two image to be compared side by side, with a handle that lets you swipe the screen left and right. Try the following demo that compares maps in Los Angeles:
http://sandbox.idre.ucla.edu/web/beforeafter/
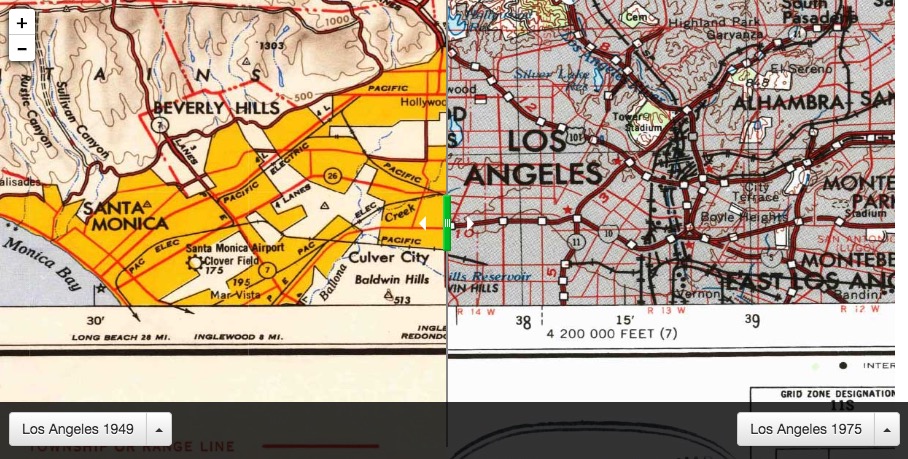
This simple map viewer puts two images side-by-side in a single viewer. The two images are separated by a "slider" with a green handle. Moving, or "swiping" the handle left and right allows you to reveal more or less of each image. Additionally, zooming in and out of the image allows you to show more or less detail within the viewer window.
When two or more images are included in the project, the dropdown menu on the bottom left and right, respectively, allows users to choose which maps to compare.
This project borrows from the following Zev Ross blog post:
http://zevross.com/blog/2014/08/12/add-a-before-after-map-slider-to-a-leaflet-map/
According to Zev, the following describes the origins of the project:
The jQuery Before/After plugin is a great interactive tool to explore changes through time. This plugin has been used to great effect by the New York Times to show changes in Japan before and after the tsunami that destroyed the Fukushima Daiichi Nuclear Plant. In most examples of the plugin, though, the maps are static images and the user cannot zoom or pan.
Thanks to the work of Graham MacDonald at the Urban Institute there is a tool that allows for the combination of the Before/After plugin with a slippy map (the kind that lets you zoom and pan). You can read Graham’s discussion but we will provide a walk-through of the code in this post. By the way, the Urban Institute has a very nice implementation of the functionality in their Poverty and Race in America map.
- If you are familiar with git, you can clone this project.
- If you are not familiar with git, you can choose to download it directly by going to the green "clone or download" button (located at the top of this page), and select "download zip".
- Unzip the project into a desired location on your computer, or your server.
- Add the images you would like to compare in the "imgs" folder. You must have at least two images, and images must have the same pixel dimensions.
- Open the "Settings.js" file in a text editor.
- Update the file with information based on the images you loaded. You will need to enter the pixel dimensions of the images (width and height), relative paths to the images, and a title description for each image.
- Open a browser, and open the index.html file.