This template will get you set up using ROS1 together with ROS2 in VSCode as your IDE.
See how I develop with vscode and ros2 for a more in-depth look on how to use this workspace.
This repo is extended to include both ROS1 noetic and ROS2 foxy. The ros1/ workspace is set up to build ROS1 packages with catkin for noetic and the ros2/ workspace is set up to build ROS2 packages with colcon.
The script ros2/ros1_bridge.sh starts the dynamic ros1/2 bridge to forward messages between nodes of both ros versions.
Some shortcuts are defined in the .bashrc file for convenience. They are listed here:
sf: as in source foxy, resolves to 'source /opt/ros/foxy/setup.bash'
sn: as in source noetic, resolves to 'source /opt/ros/noetic/setup.bash'
s: as in source (local), resolves to 'source install/setup.bash' to source local environment in ROS2
m: as in make, resolves to 'bash build.sh', requires a build script to be present in the local directory
ROS2-approved formatters are included in the IDE.
- c++ uncrustify; config from
ament_uncrustify - python autopep8; vscode settings consistent with the style guide
There are many pre-defined tasks, see .vscode/tasks.json for a complete listing. Feel free to adjust them to suit your needs.
Take a look at how I develop using tasks for an idea on how I use tasks in my development.
This template sets up debugging for python files and gdb for cpp programs. See .vscode/launch.json for configuration details.
The template also comes with basic continuous integration set up. See .github/workflows/ros.yaml.
To remove a linter just delete it's name from this line:
      matrix:
linter: [cppcheck, cpplint, uncrustify, lint_cmake, xmllint, flake8, pep257]You should already have Docker and VSCode with the remote containers plugin installed on your system.
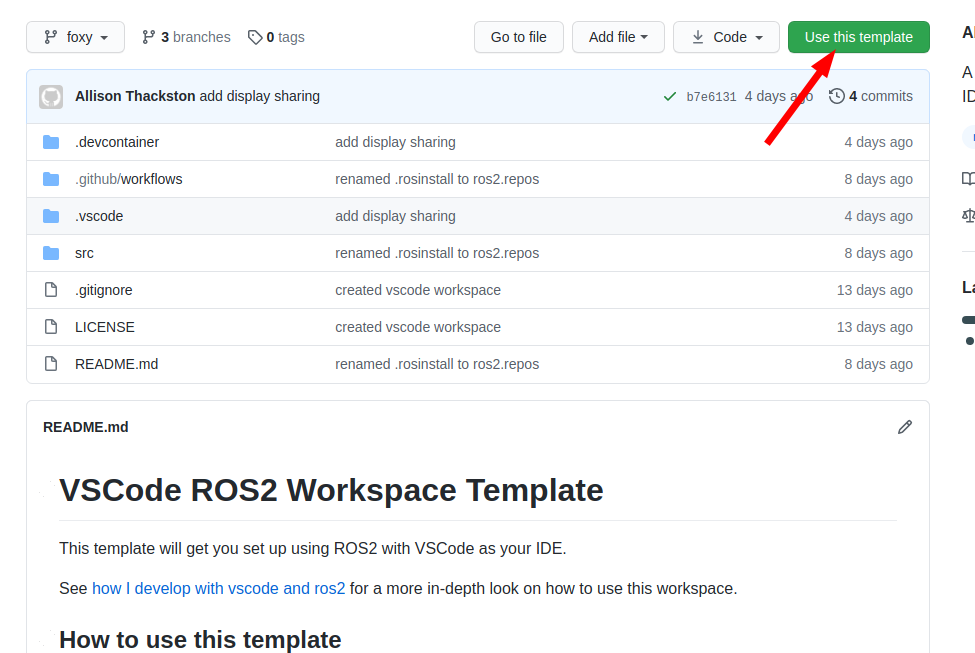
Click on "use this template"
On the next dialog, name the repository you would like to start and decide if you want all of the branches, or just the latest LTS: Foxy.
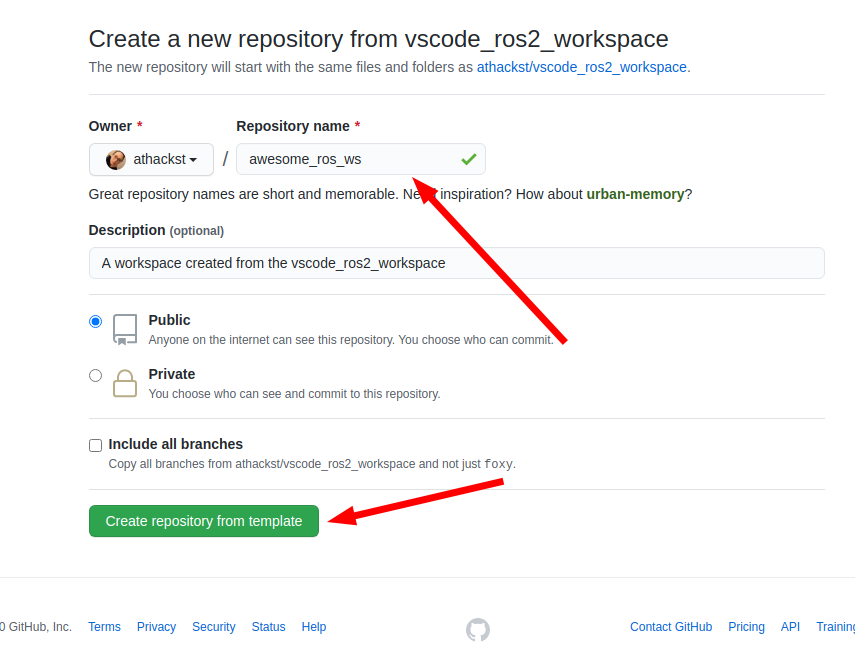
Github will then create a new repository with the contents of this one in your account. It grabs the latest changes as "initial commit".
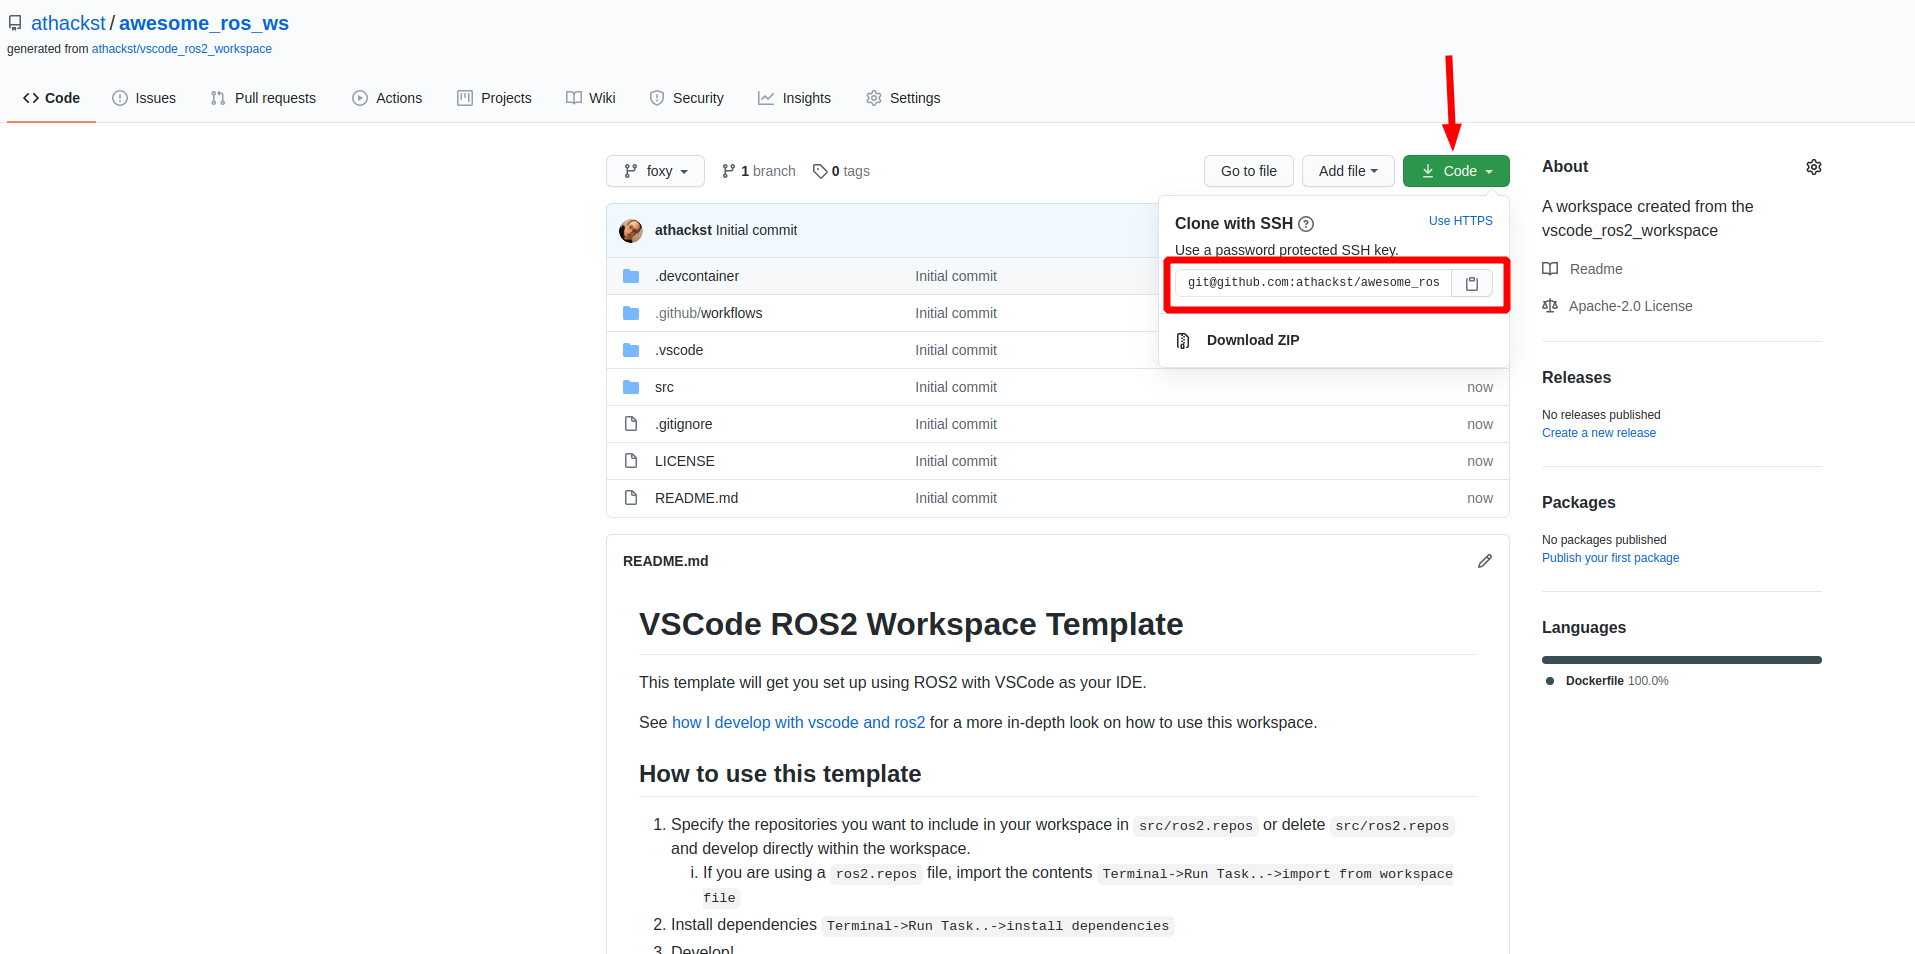
Now you can clone your repo as normal
Now that you've cloned your repo onto your computer, you can open it in VSCode (File->Open Folder).
When you open it for the first time, you should see a little popup that asks you if you would like to open it in a container. Say yes!
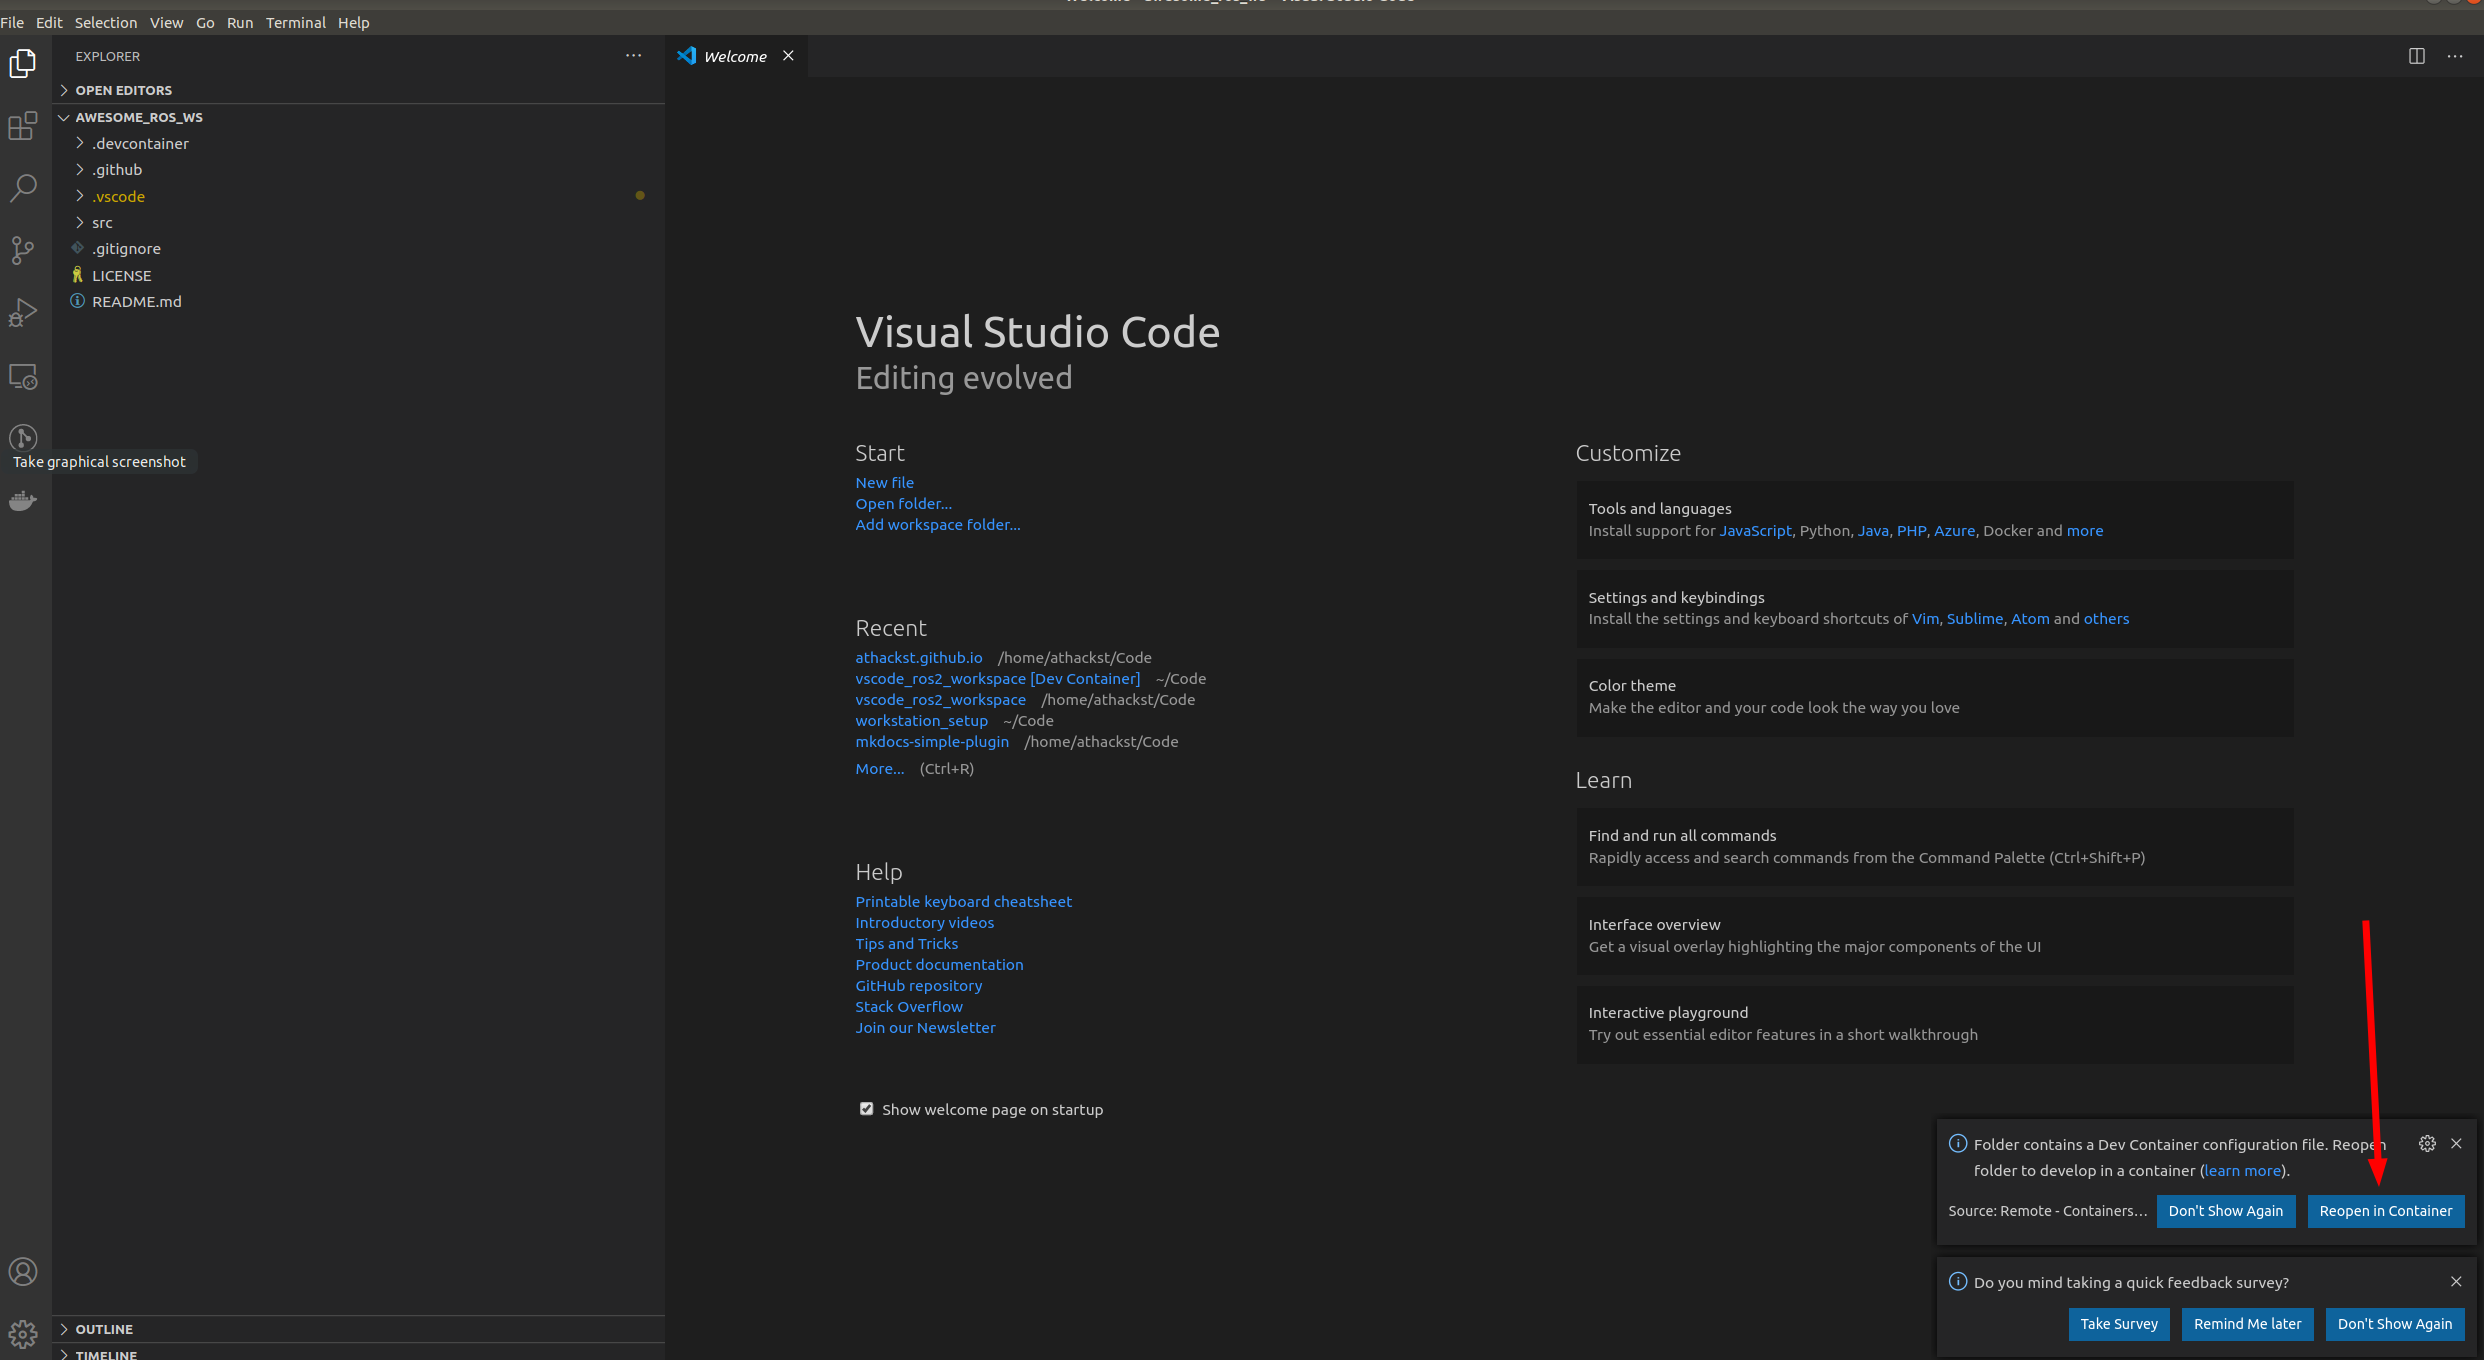
If you don't see the pop-up, click on the little green square in the bottom left corner, which should bring up the container dialog

In the dialog, select "Remote Containers: Reopen in container"
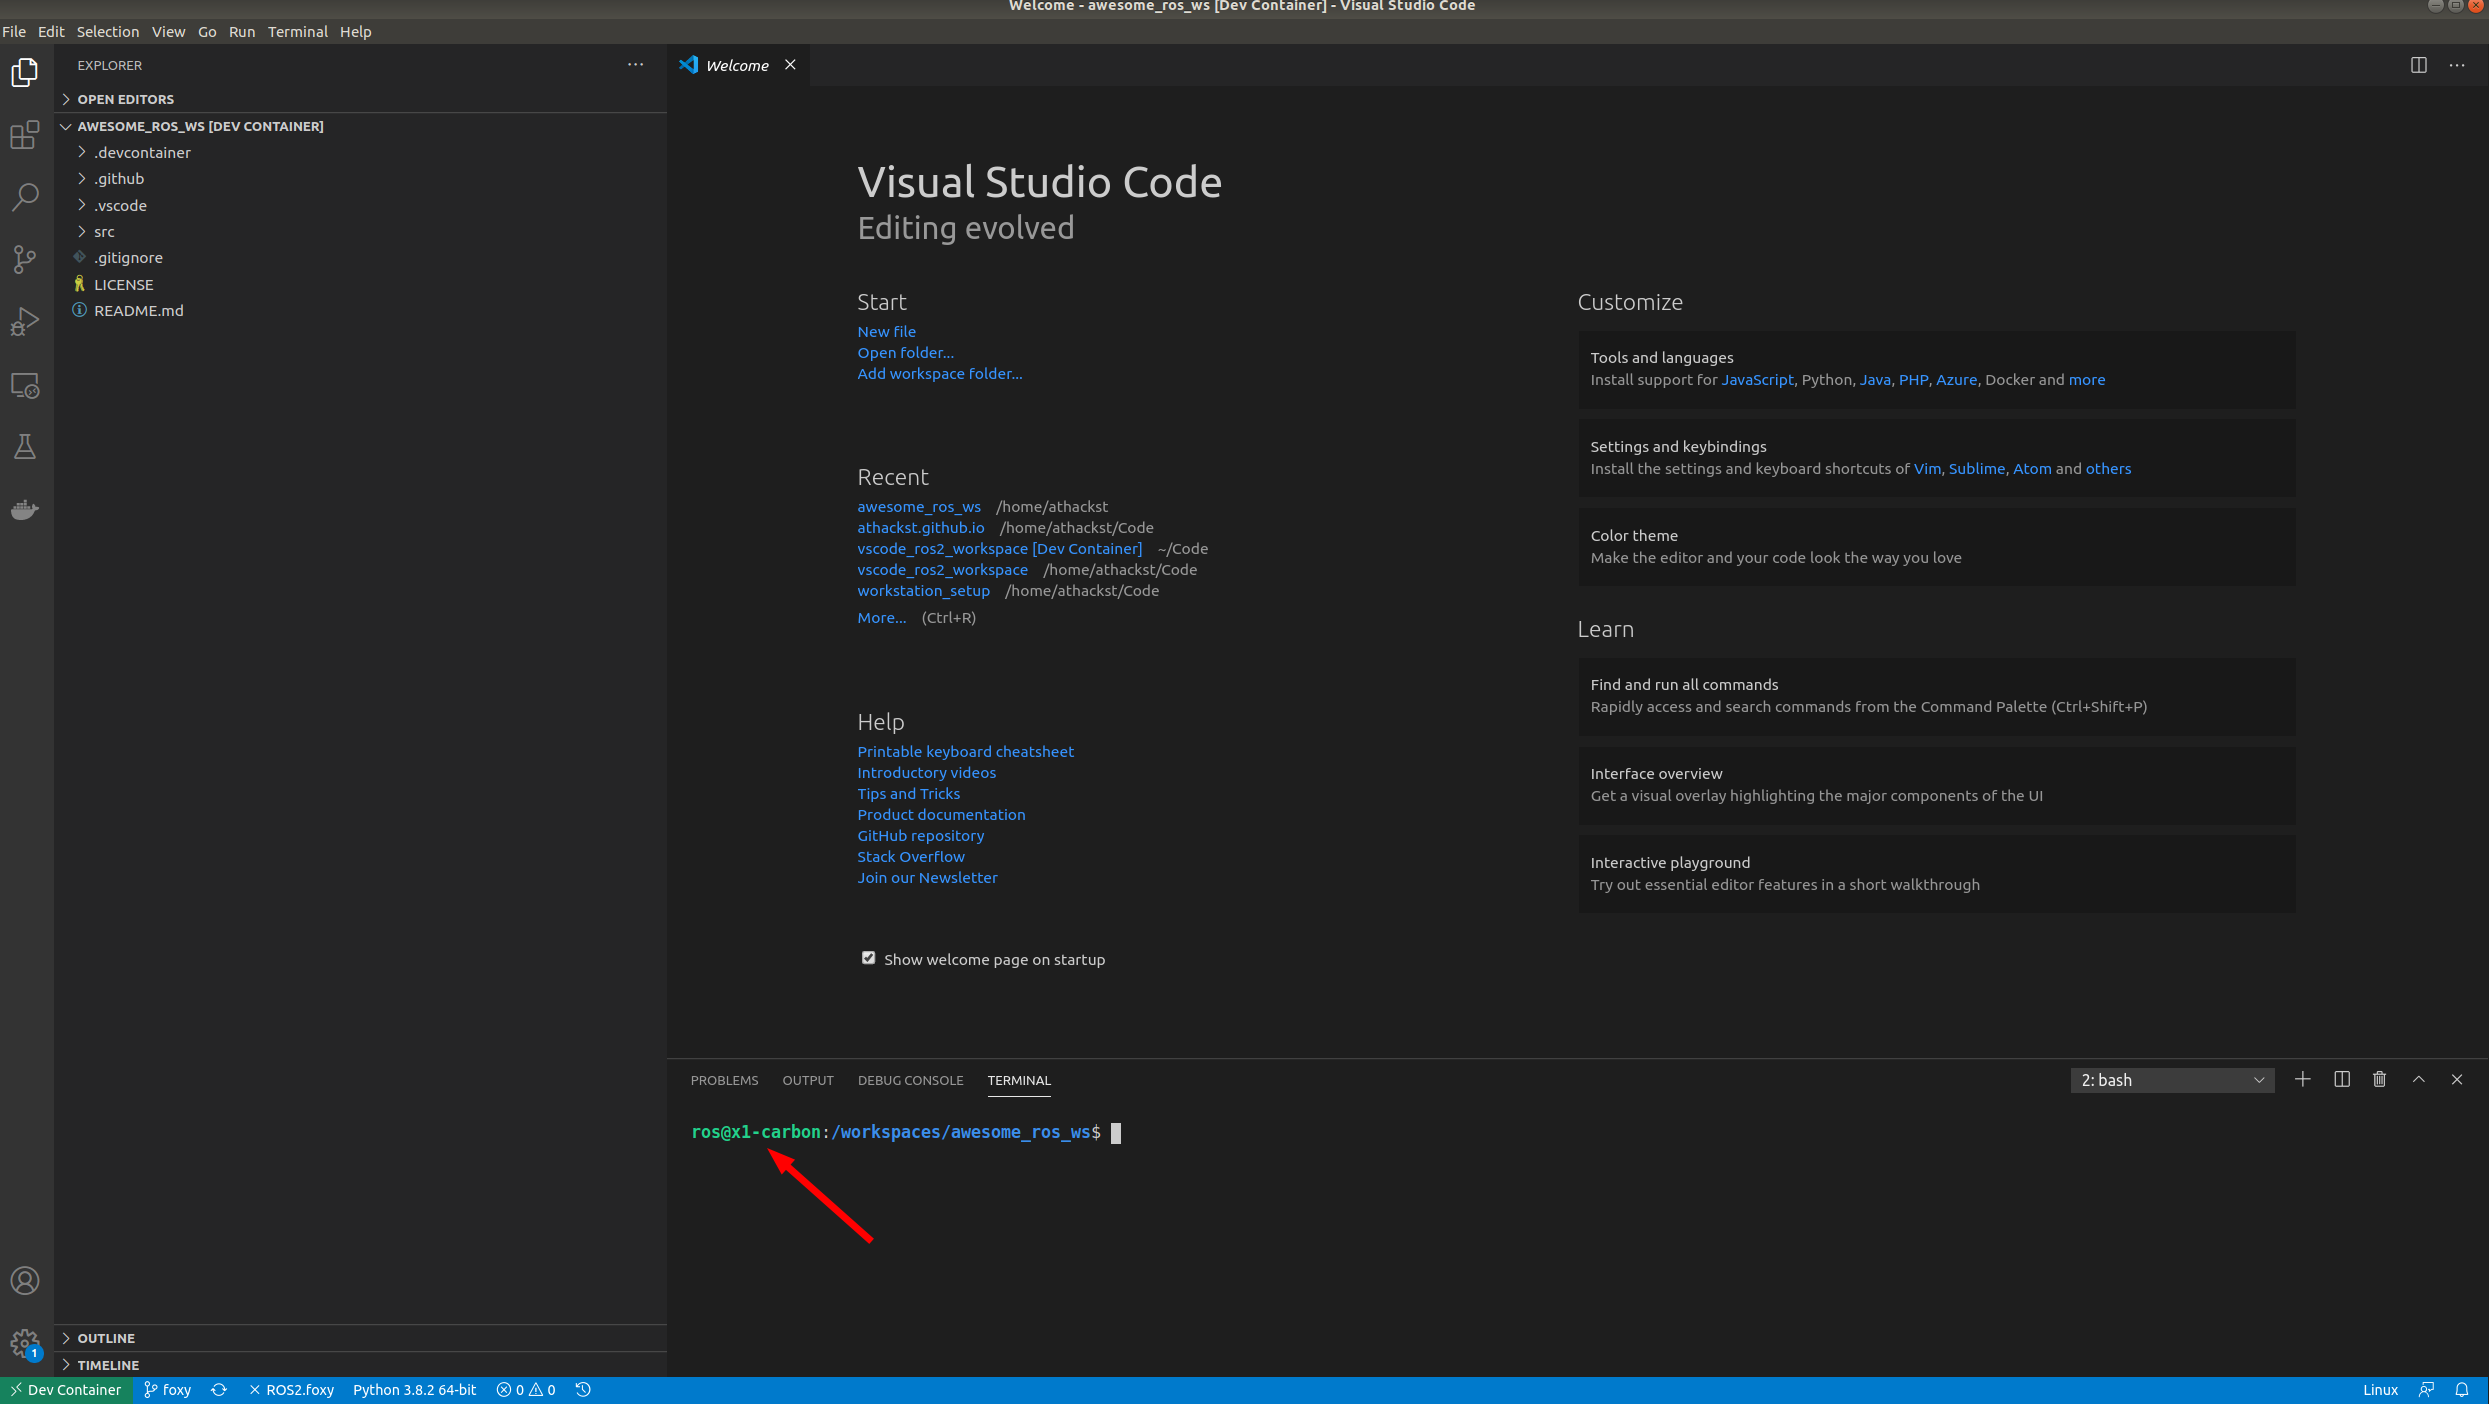
VSCode will build the dockerfile inside of .devcontainer for you. If you open a terminal inside VSCode (Terminal->New Terminal), you should see that your username has been changed to ros, and the bottom left green corner should say "Dev Container"
- Specify the repositories you want to include in your workspace in
src/ros2.reposor deletesrc/ros2.reposand develop directly within the workspace.- If you are using a
ros2.reposfile, import the contentsTerminal->Run Task..->import from workspace file
- If you are using a
- Install dependencies
Terminal->Run Task..->install dependencies - Develop!