User manual
This page describes how to use dnsphpadmin after successful installation, assuming some DNS zones are configured.
Here is an example login page you can see after login to the application:
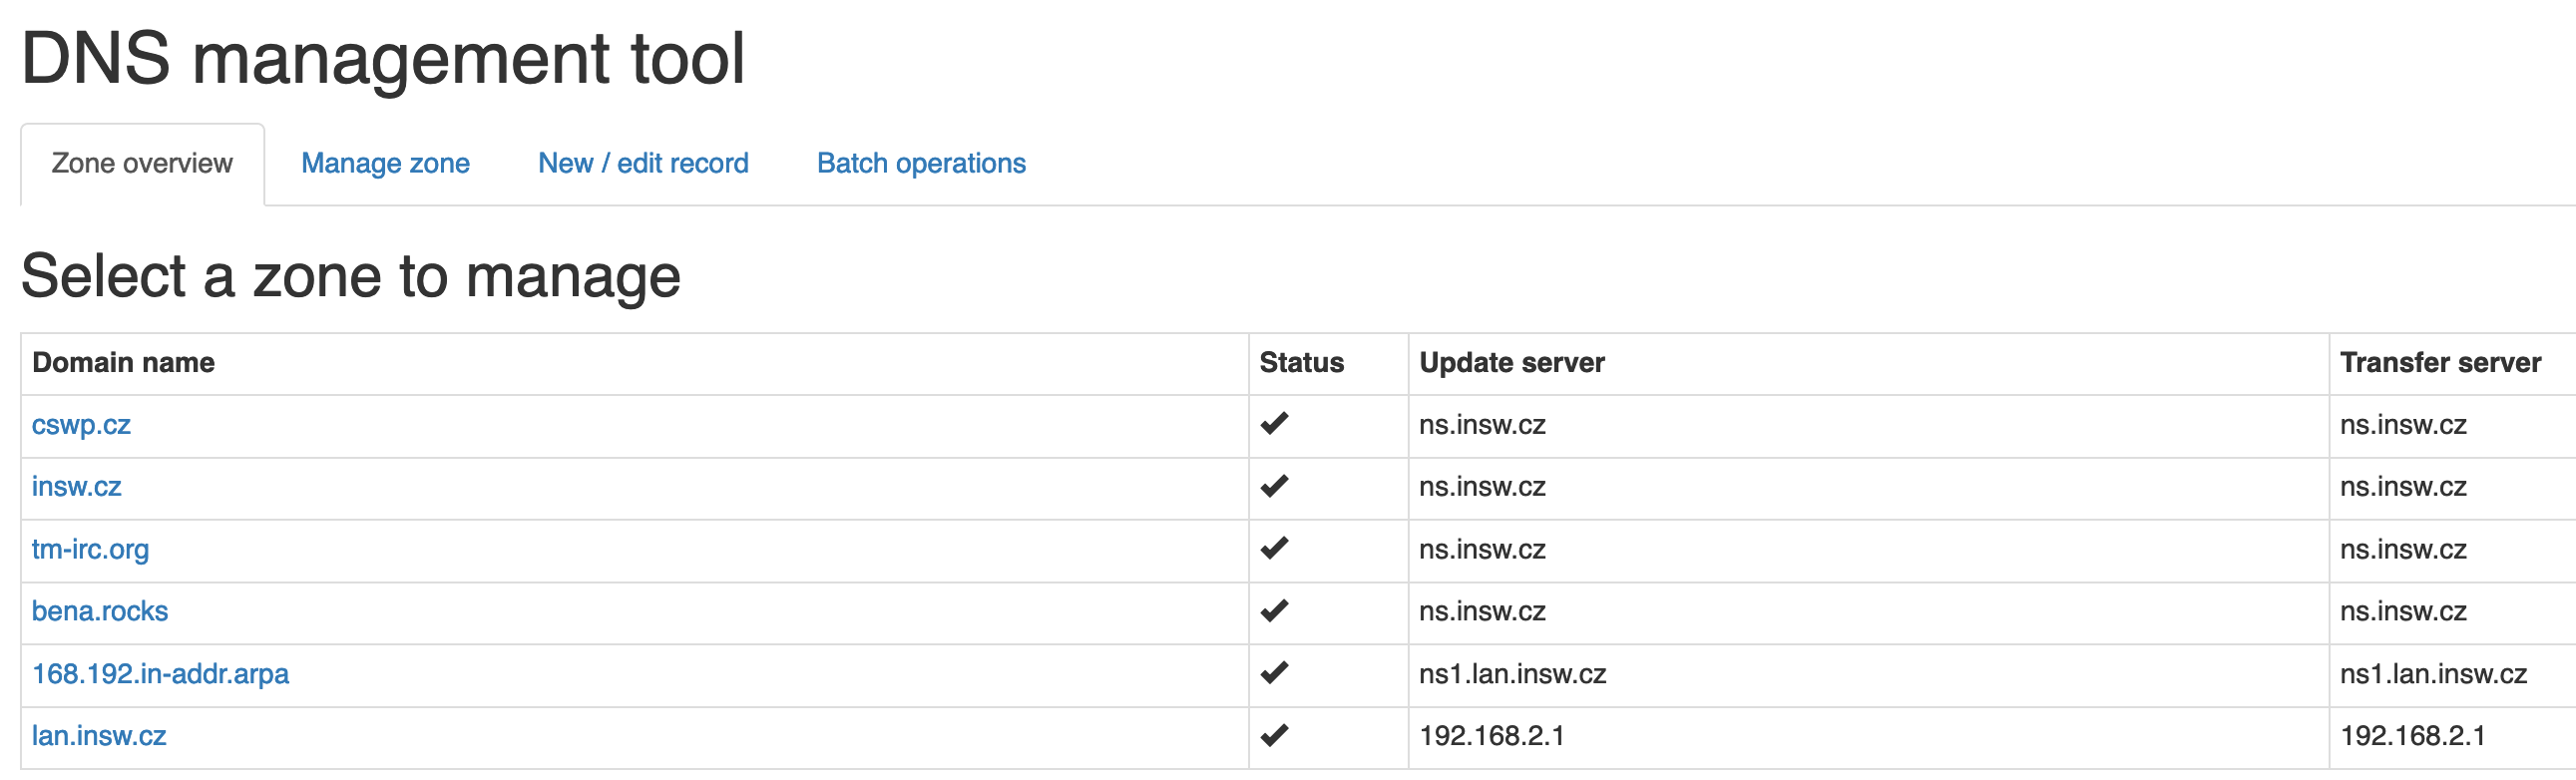
This main page contains overview of all configured zones, each zone contains its status as well as transfer server which is used to read its content (dig AXFR), and update server which is used to perform changes via nsupdate. These are typically same, in most cases both values are pointing to zone master server.
When you click on a zone, tool will perform dig AXFR (full zone transfer) and display contents like this:
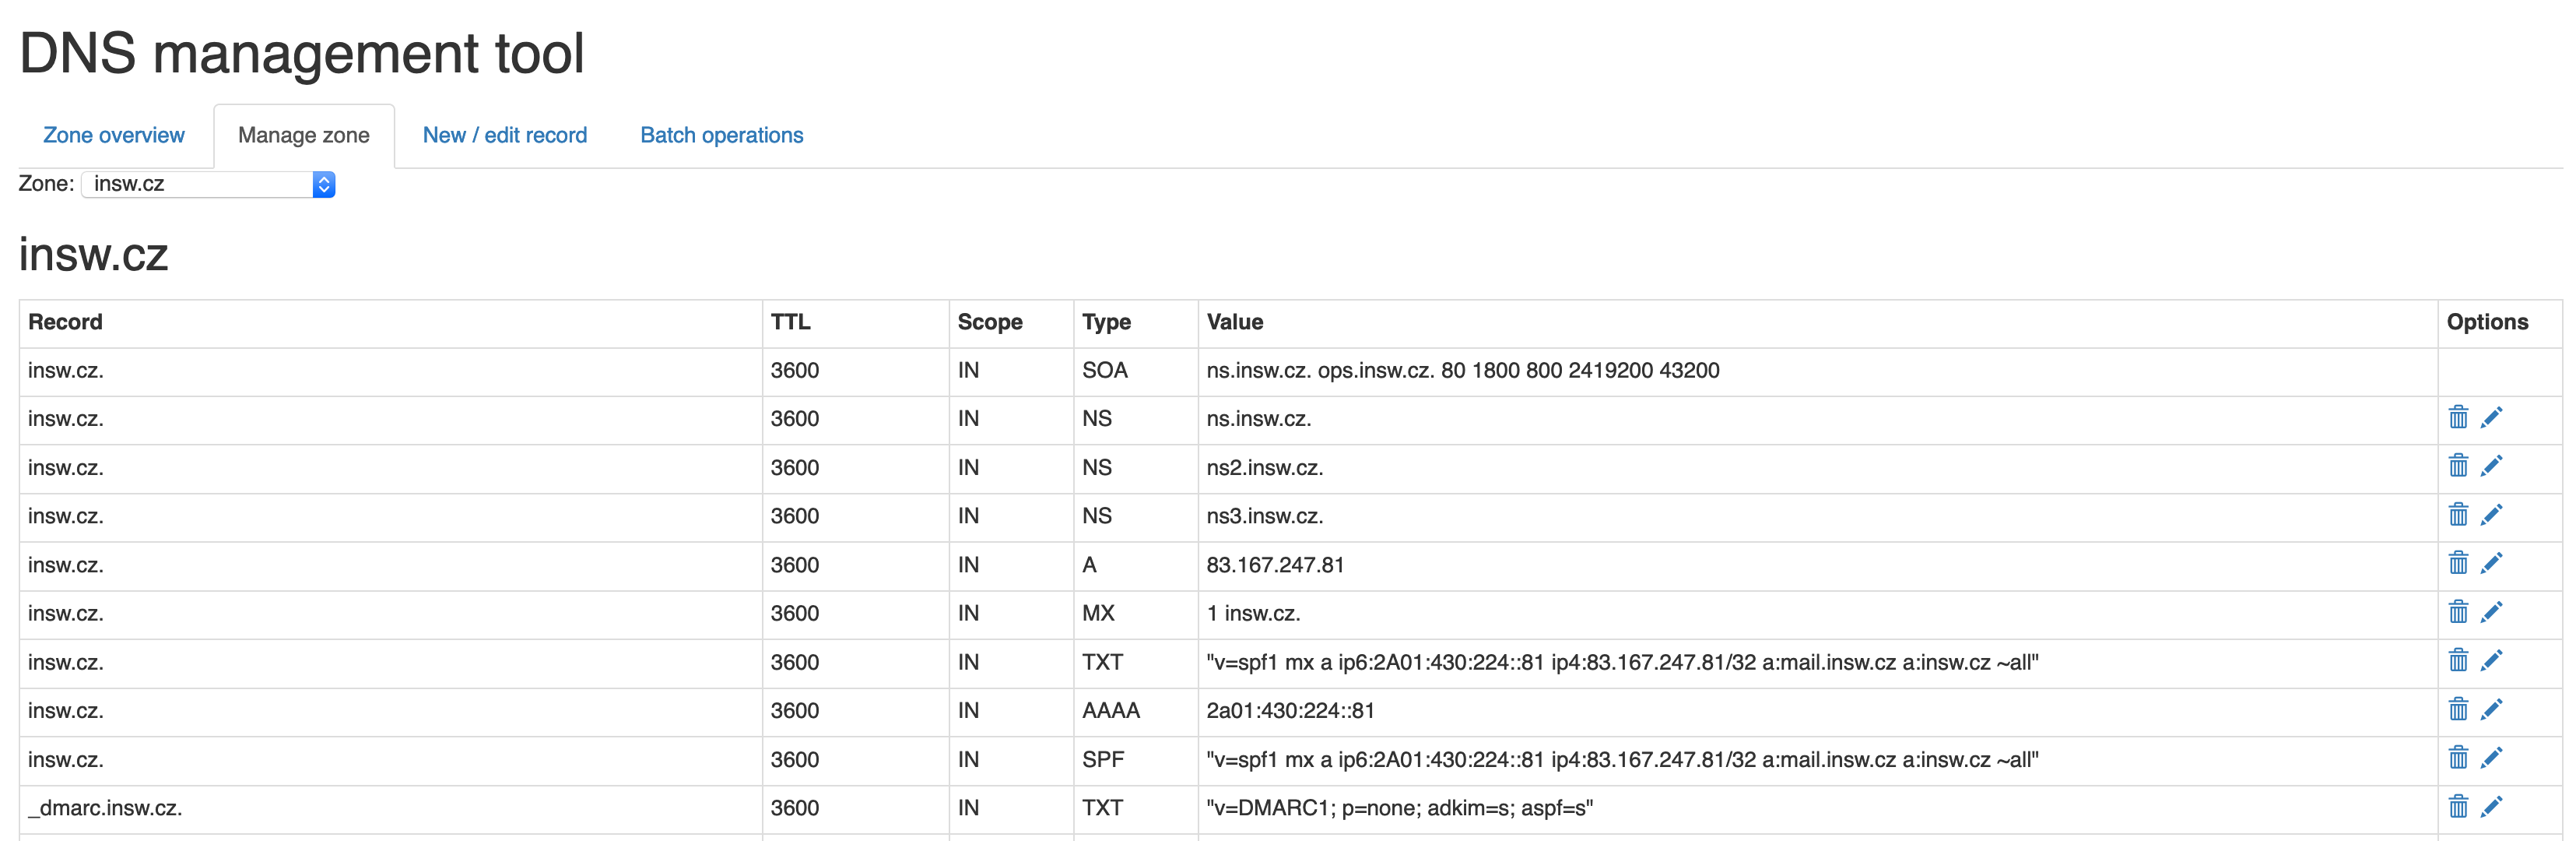
In this view, you can see all existing records and if you have write access, you can also modify or delete each of them, using respective symbols on side.
In case you want to add a new DNS record, you can click tab New / edit record which looks like this:
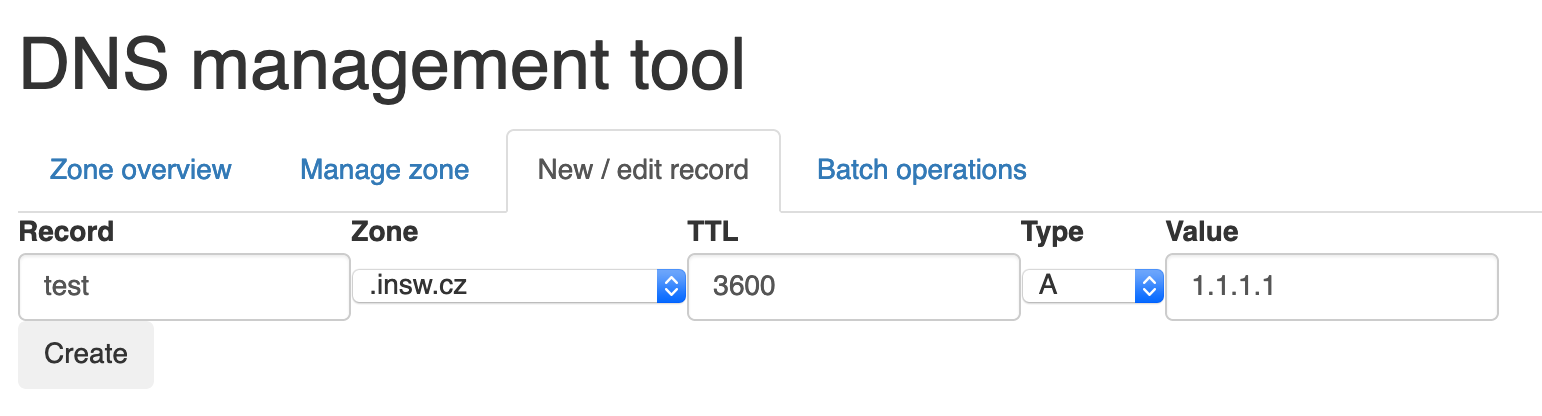
In this dialog you can add new records, in first text field add name of record, do not suffix it with zone name. You can also choose own TTL and record type. In last text field is value of the record.
Same view is used when modifying existing DNS records. You can also add multiple records at once using batch form:
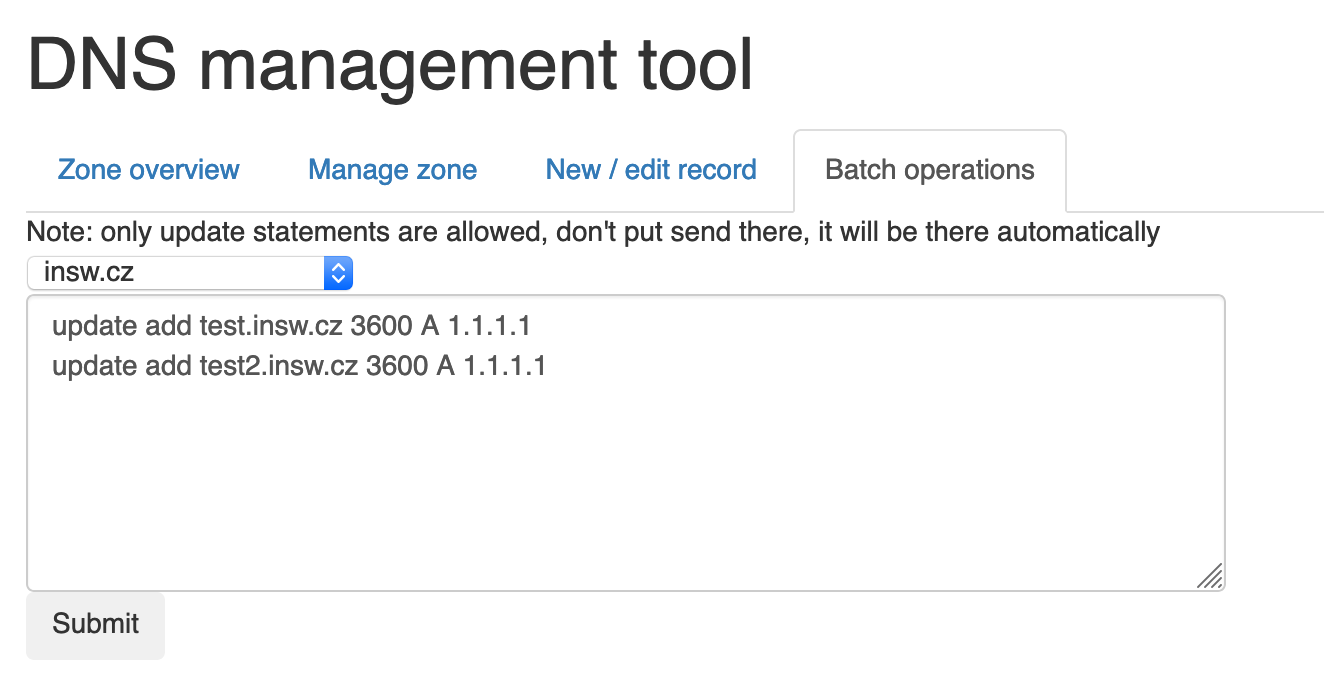
This batch form can only contain commands prefixed with update, no control commands for nsupdate are allowed for security reasons.